Advent Calendar by Valou

Hello everybody! 

 Today, I come to share with you my project for "Snap Dragon Snippets"!


To realize this set, I used the file of "Snap Dragon Snippets", HERE.

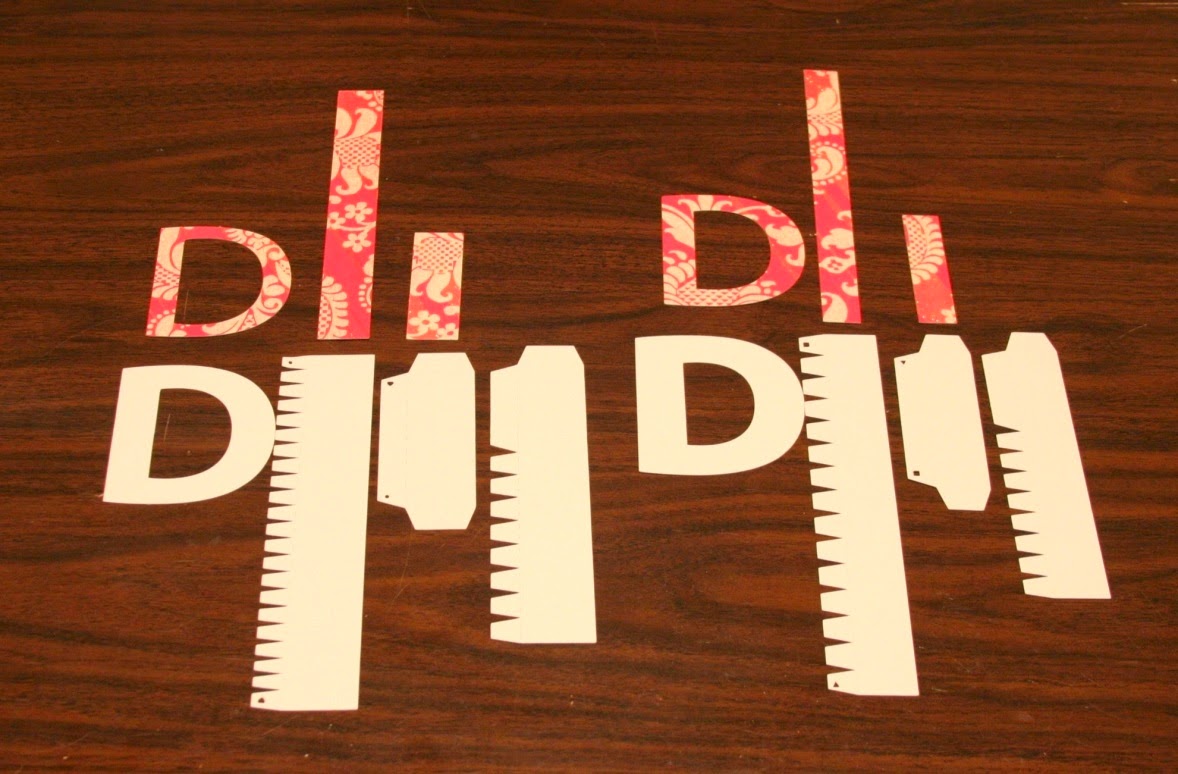
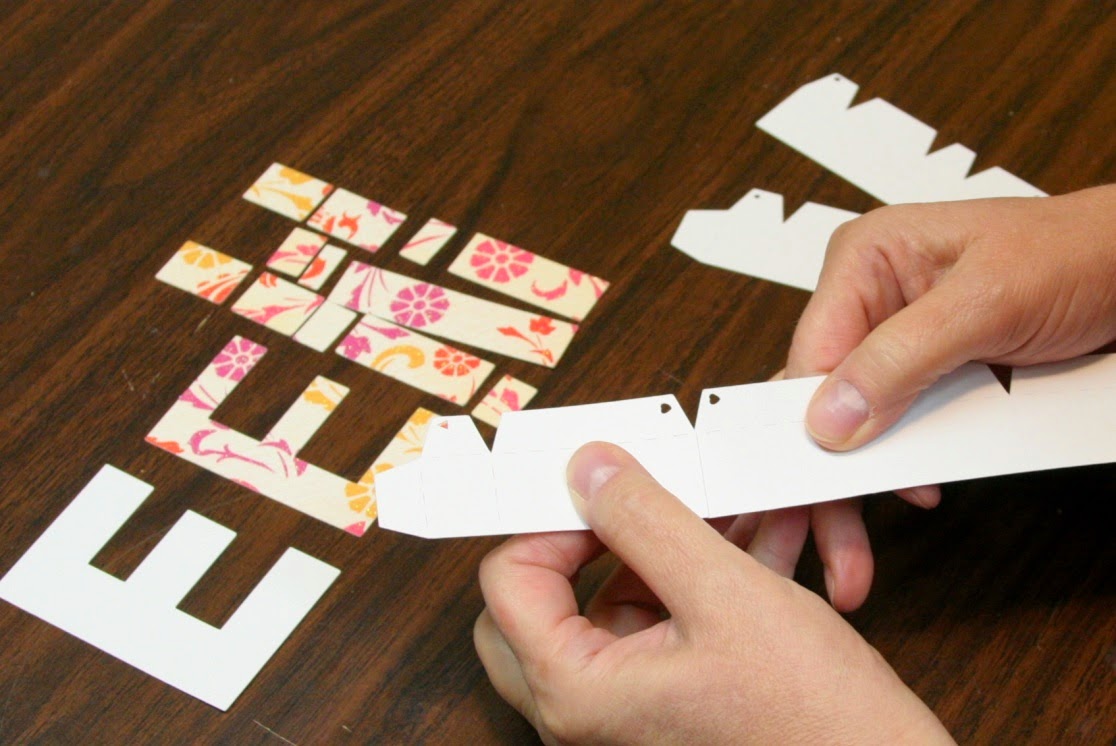
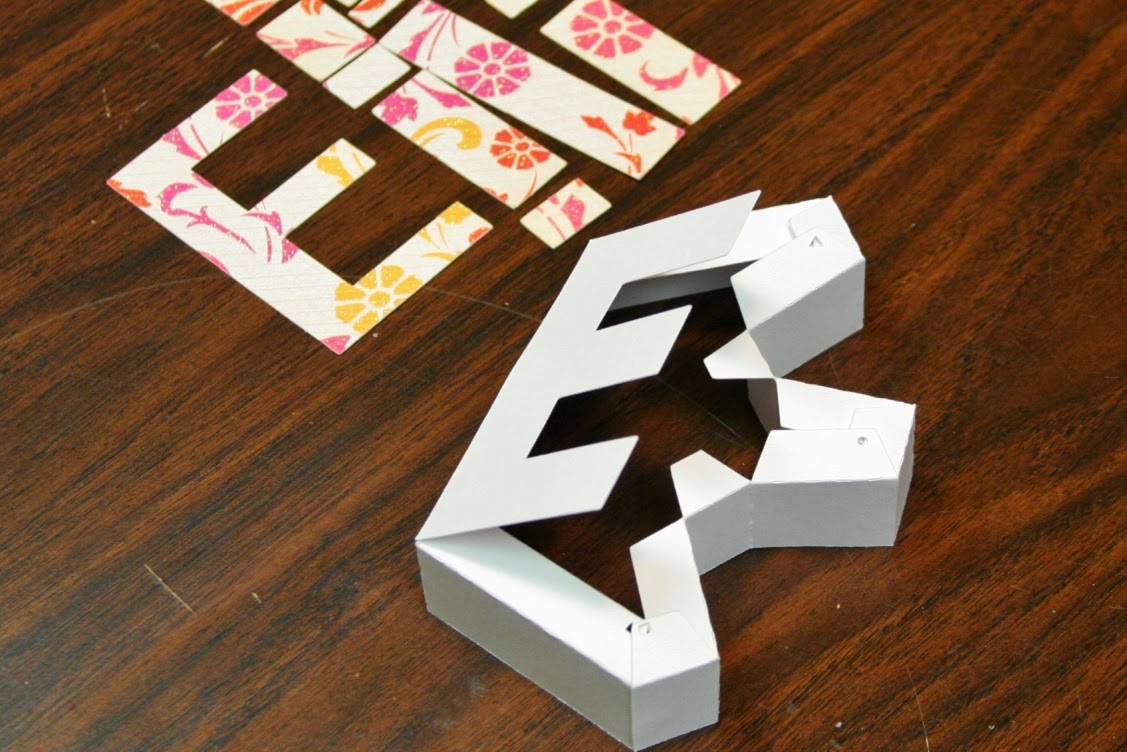
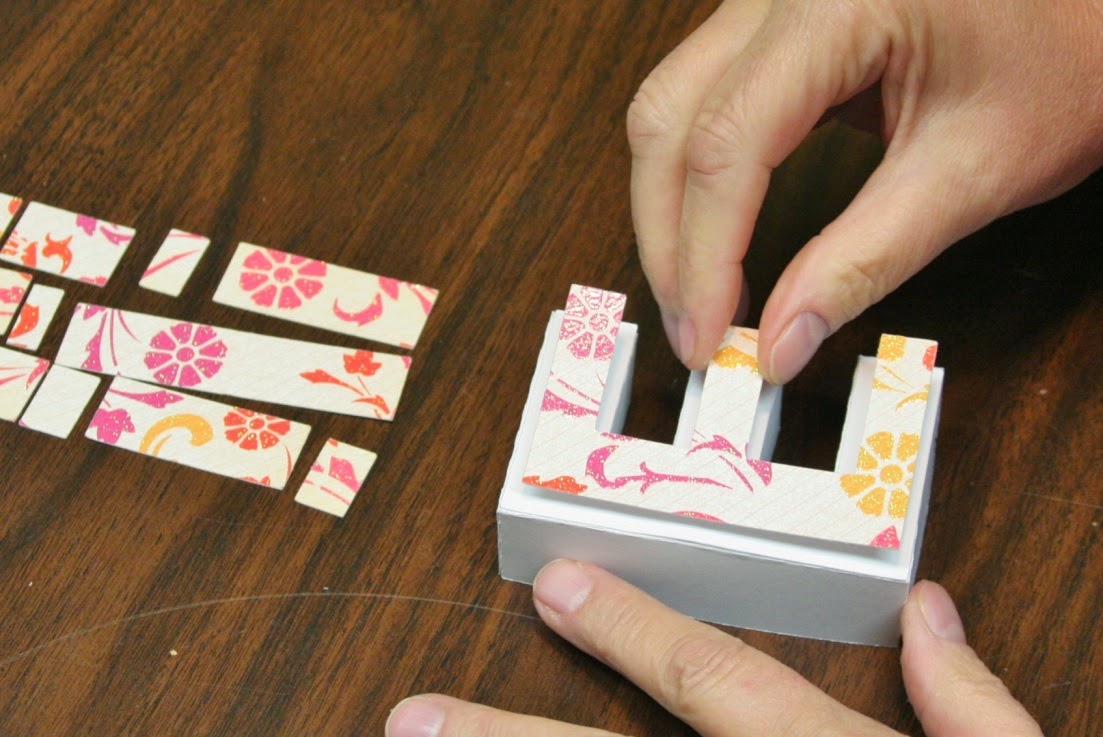
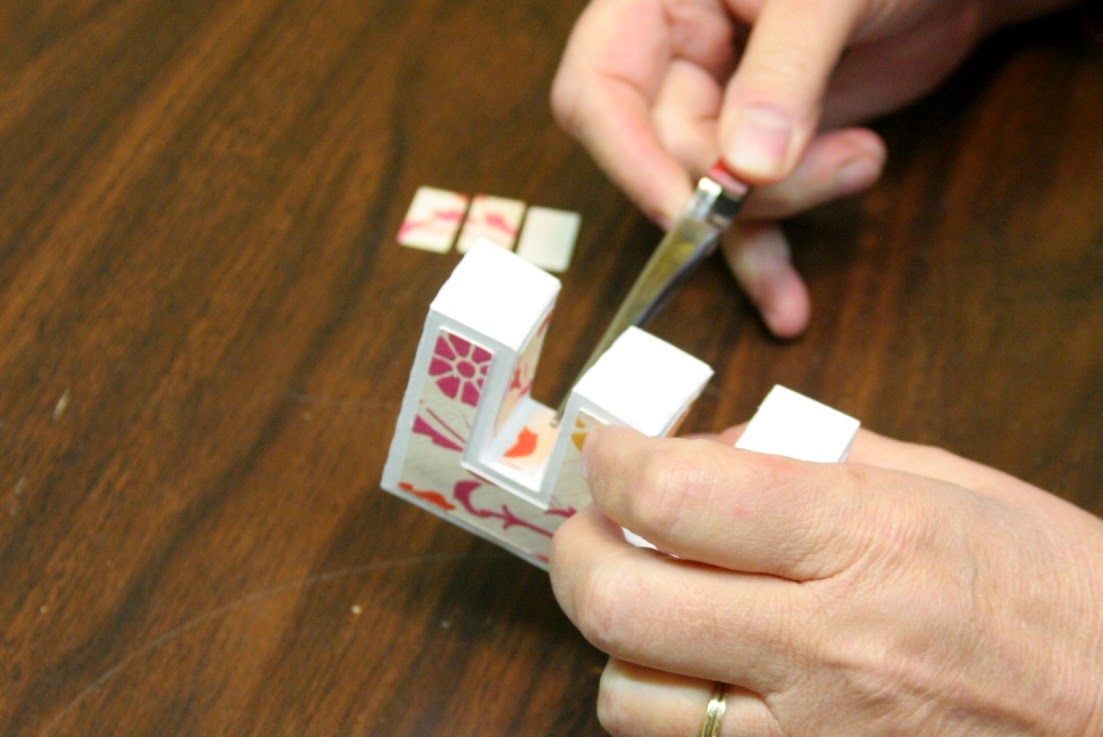
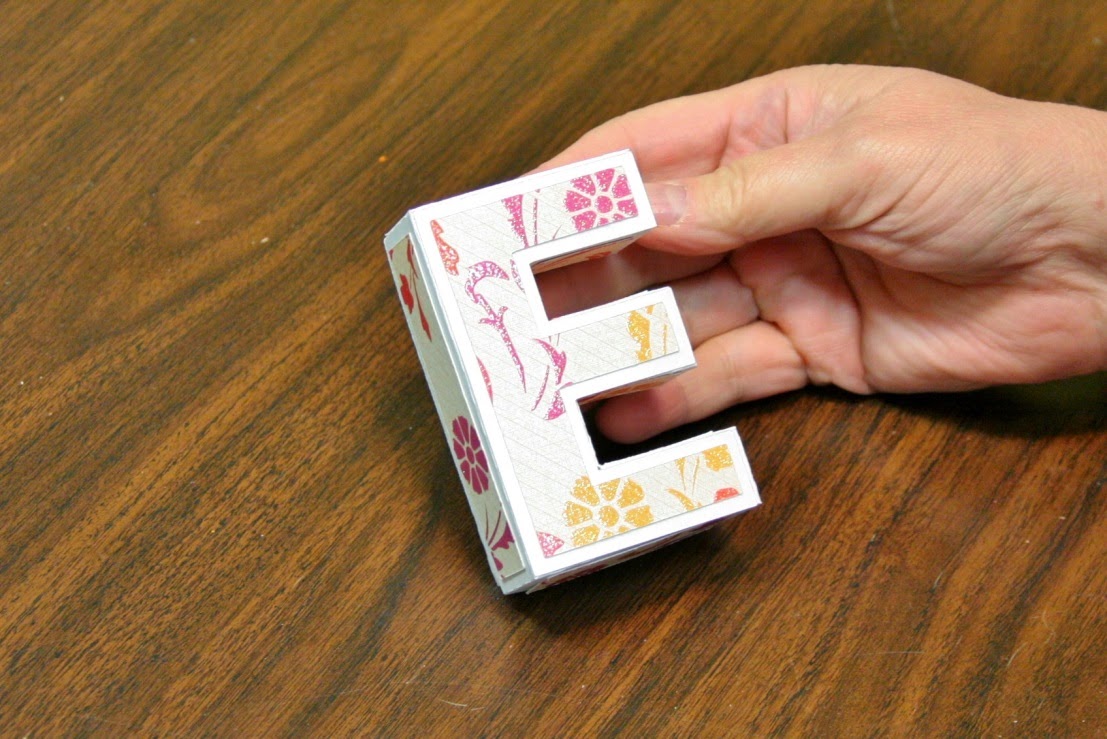
All the parts are cut with the machine " Silhouette Studio ".

I used the following papers:

- White Bazzil Cardstock.
- Papers " Winter Collection " and "Spring Collection".
- Blue paper "Action".
- Cardboard of recycling.
- White Bristol.
- Cardstock chestnut.

Any goshawk, I added barriers cut with the " Silhouette Studio ". Then, in front of, I stuck dies-cuts realized with a dies " Noor!Design ", "Border Snowflakes".

Finally, I stuck of the ribbon " Organza Mahogany " and I finished with a small knot.


To the left of the house, I decided to make an extension to realize the garden.

All the bottom is covered with artificial snow in spray.

I realized an ice rink with a die-cut realized with a dies " Noor! Design ", " Round 2 ".


I realized a tree with a file of cut " Silhouette Studio Store". Above, I added a little artificial snow and diverse blue, pink and white pearly pearls to represent Christmas baubles.

I also added a wooden "Treillis" of the shop " HobbyCutz ". Above, I stuck some pearly pearls as well as some flowers: white Poinsettia, blue Poinsettia, white and red Rose ( WOC), white Rose ( WOC), blue Rose " Kaisercraft " and spangled red berries. At the foot of this "Treillis", I stuck a silvery and spangled pine cone, a cloth white rose, a red "Lily" and a spangled red berry.


Then, I added a small glass sled. Above, I stuck a red flower.

For the rest, I added a reindeer cut with "Silhouette Sutdio" and die-cuts "Fir trees".

On the ground, I stuck some white balls spangled in polyester.


I used several rubberstamps " Magnolia Ink ".

I colorized them with the following ink:

- Ink "Distress Tattered Rose" and "Distress Vintage Photo" for the skin.
- Ink "Distress Antique Linen", "Brushed Corduroy" and "Distress Walnut Stain" for hair.
- Ink "Distress Fayded Jeans".
- Ink "Distress Aged Mahogany".
- Ink "Distress Pumice Stone".
- Glitter Stickels Diamond.


On the roof, I added pieces of garland, some artificial snow and a small wooden cock.


On the window of the top, I added a knot realized with a piece of ribbon " Organza Mahogany " and decorated with a white rose (15 mm) ( WOC).

I added a small banner realized with a dies " Noor! Design " on whom I stuck "Rub-On", "Merry Christmas". I inked it to the ink "Distress Walnut Stain".


For the rest, I added various embellishments:

- Spangled and silvery pine cone.
- Spangled red embellishment.
- Wooden embellishment (received in present in a magazine).
- Plastic ax (recycling).

Here we are! I hope that my realization has you more and that it will inspire you.


I thank you for your passage and wish you an excellent day! Bye for now!

Hugs, 


3D Letter "E" Tutorial

Happy THANKSGIVING everyone!
We at Snapdragon Snippets wish you a restful and joyous day with your family and friends.

Debb is sharing another great tutorial. This time is the 3D Box letter E file #28784

Identify the pieces. There will be matching symbols cut into the tabs to help keep the top pieces and the bottom pieces together.

The HEART, DIAMOND, SQUARE, and CIRCLE are the narrower panels and create the top.
(Note: the DOUBLE TRIANGLE, DOUBLE CIRCLE , DOUBLE HEART and DOUBLE RECTANGLE  are the wider pieces and create the bottom. The process is done in reverse, with the letter being upside-down.)

Match the ends and glue together. Continue gluing all the matching pieces.
  

The last piece will connect to the first piece creating a loop and forming the outside of the letter.


Identify the long side of the shape and attach the long side of the E. You can fold at the score lines at this point. 

Fold the tabs inward and create the E shape. Glue the top down to the tabs.


It might be helpful to press on the tabs from the inside.


Attach the decorative panels.


The inside panels are small and you might need tweezers to get them in place. You might also want to add the panels before you attach the top.


The completed letter E.

For more 3D Box tutorial see links below:
3D Box Letter A -Video
3D Box Letter B
3D Box Letter C
3D Box Letter D

3D Cornucopia -- with Julie


Here it is, Wednesday, and the day before Thanksgiving here in the U.S.  Julie here today from Muddy Paws & Inky Fingers. I needed a centerpiece for the dinner table, and being crafty, I decided it was best to make it.  After all, why buy fruit when you can make it, right?
The cornucopia and everything in it is from Snapdragon Snippets.  I had such fun with this!

There's 3D apples, a 3D pear, and even a 3D pumpkin, all tucked inside a fancy cornucopia all found in the Silhouette Design StoreYou can also find this in the SVG Attic store here.
All papers for this project are from Close To My Heart.  The cornucopia is made out of Kraft and designer paper from the Path Finding paper pack. I cut everything out on my Silhouette Cameo.
Make sure to check out the new Snapdragon Snippets store for lots of fun projects.  Then, visit the blog each day for great inspiration from this talented design team.  And, check out the Snapdragon Snippets Facebook page, too, for even more inspiration, fun, and contests. 
This Thanksgiving, I'm counting my blessings.  And you, are among them!

3D Letter "D" Tutorial

Today we have Debb sharing another awesome tutorial.  This time is the 3D Letter D Box file #28783


Identify the pieces. There will be matching symbols cut into the tabs to help keep the top pieces and the bottom pieces together.

The SQUARES and DIAMONDS are on the narrower pieces and create the top. Match the ends and glue together. Continue gluing all the matching pieces.
(Note: the HEART and CIRCLE are the wider pieces and create the bottom.)

The last piece will connect to the first piece creating a loop and forming the outside of the letter.

The remaining piece will connect and become the middle of the D. Bend both pieces at the score lines.


The tabs on the inner wall fold out, and the tabs on the outer wall fold in. Attach the long side of the D first, then add glue and adhere the remaining tabs.

It may be easier to secure the tabs if you turn it upside down and press on a hard surface.

Then attach the inside of the D to the top in the same manner.

Add the decorative top and side panels.

The bottom part of the letter is constructed in the same manner, but the pieces are in reverse.


The finished letter D!

For more tutorials on the 3D letter boxes see links below:
3D Box Letter A -Video
3D Box Letter B
3D Box Letter C

Autumn Bouquet

Today is my turn to post for www.snapdragonsnippets.com  You can purchase this at the new store by clicking onto the link above. Autumn Bouquet 3d box card. I couldn't resist this beautiful card in a box. Who wouldn't love to receive this.

3D Pilgrim Hat

Hello! This is Debb and today I'm bringing you the 3D Pilgrim Hat Large Décor, and can be found in the new SnapDragon Snippets store here. This is a nice large decoration, and would look great as a focal piece, placed on a pedestal, or grouped with other Thanksgiving items! It comes with all of the accessories shown except the large flower and ribbon!

This is also in a fabulous kit called "Pilgrim's Prayer" in the SVG Attic store here. I hope you pick up this fun-to-make hat and embellishments and get one made for your Thanksgiving day festivities! Thanks for looking!

3D Letter "C" by Christy

Today we have Christy guiding you through constructing the 3D letter C box file #28782


1.       Cut all pieces. The image below represents the layout of the files when imported into your cutting program.


2.       Crease all score lines. Use bone folder to reinforce the creases. This is particularly important for curved letters to get a nice, crisp fold.
3.       Choose your first grouping to assemble (I chose group 2). The 3 pieces in this group are:
a.       The “C”
b.      A longer strip with tabs along one edge only (the outside of the “C”).
c.       A shorter strip with skinny tabs along the edge and fat tabs at each end (the inside of the “C”)
4.       Make note of the icons on the ends of each strip. These will be important to help you match up the pieces at a later step.
5.       Apply adhesive of choice along the length of the tabs. I suggest not using liquid adhesive for this as it will not dry quick enough to keep the curves from creeping open. I used the 3M ATG gun and adhesive for this project, but if making a larger size it might be best to use Sticky Strip or [[other strong adhesive I have]] Don’t forget to also apply adhesive to the tabs on the ends of what will be the inside curve of the “C”.
6.       Beginning with the strip for the outside of the C, start with one end and match it to the lower outside corner of your “C”. Adhere the strip along the outside curve, curving the paper to fit the “C” as you go.


7.       Pick the end of the inside strip whose icon matches the icon on the outside strip at the bottom of the “C”. In my case, this was the square.
8.       Adhere the tab at the end of that strip to the inside of the strip you just adhered to the outside of the C. Look at the picture…it will make sense!


9.       Begin adhering the inside strip along the ends and inside contour of the “C”, pressing to ensure the adhesive takes very well.


10.   Finish the inside strip by adhering the end of the strip around the corners of the top of the “C”.


11.   Run your fingers along the inside of the box top you created to reinforce the adhering of the tabs
12.   Repeat steps 6 through 11 to create the bottom of the box in the same manner.
13.   Once complete fit the top and bottom together and make any adjustments if necessary.
14.   Working with group 1, apply adhesive to the back of the accent paper and adhere it to each section of the top of the box. The longer rectangle will adhere to the outside edge and the shorter rectangle will adhere to the inside edge.


15.   Repeat with group 2 of your accent paper, adhering in the same fashion as group 1.


16.   Once all accent paper has been applied, place the box top on the box bottom and admire your completed project!


Tips for curvy letters
·         When using bone folder on the creases of all of the tabs, flip the piece over so the tabs are on the bottom and your solid piece is on the top… Then run your bone folder over the length of the crease.


·         At the points where the paper will curve for a letter, use the bone folder to give the paper a slight curve by running the paper over the bone folder edge in the same motion you would use for curling ribbon.


Related Posts with Thumbnails